Creating a digital product that people actually enjoy using requires more than just making things look nice. It demands a structured approach to understanding human behavior, needs, and limitations. This guide walks you through the end-to-end process of user experience design. We will move from the initial spark of an idea to a functional prototype ready for development.
Whether you are a student, a career switcher, or a developer looking to improve your interface skills, following a disciplined workflow is essential. This process ensures that decisions are based on evidence rather than assumptions. Let’s begin the journey from concept to completion.
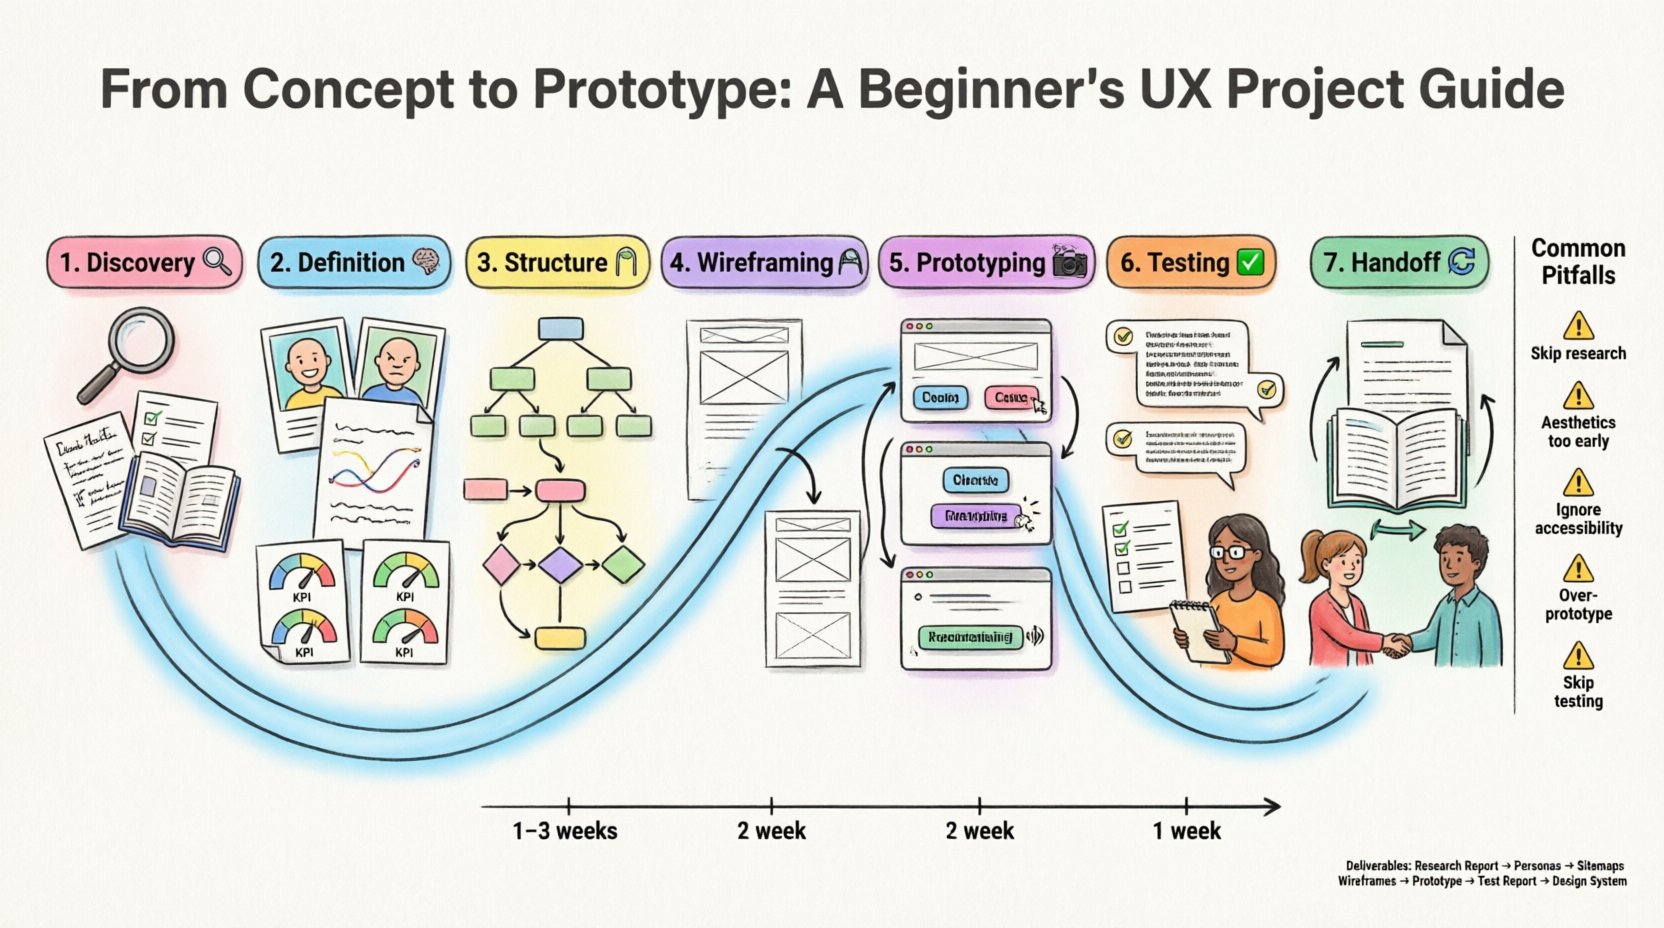
Phase 1: Discovery and Research 🔍
Before drawing a single line, you must understand the problem you are solving. This phase is often called the “Discovery Phase”. It is about gathering information to form a solid foundation for your design.
1.1 Define the Problem Statement
Start by articulating the core issue. A clear problem statement keeps the project focused. It answers the question: Who is having a problem, what is the problem, and why does it matter?
- Identify the target audience.
- Describe the specific pain point they face.
- Explain the consequences of not solving this problem.
1.2 Conduct User Research
Research provides the data needed to validate your ideas. You can use various methods to gather insights.
- Interviews: One-on-one conversations with potential users. Listen more than you speak.
- Surveys: Quantitative data to understand trends across a larger group.
- Competitive Analysis: Review similar products to see what works and what fails.
- Observation: Watch users interact with current solutions in their natural environment.
1.3 Synthesize Findings
Raw data is difficult to act upon. You need to organize it into meaningful patterns. Look for recurring themes across your interviews and survey results.
- Group similar observations together.
- Highlight contradictions or surprising insights.
- Create a summary report for stakeholders.
Phase 2: Definition and Strategy 🧠
Once you have gathered enough information, it is time to define who you are designing for and what goals you need to achieve. This phase bridges the gap between research and design.
2.1 Create User Personas
A persona is a fictional character that represents a user segment. It helps the team empathize with the people who will use the product.
- Give them a name and a background story.
- Define their goals, motivations, and frustrations.
- Include a photo to make the persona feel real.
Example Persona Attributes:
| Attribute | Description |
|---|---|
| Name | Jane Doe |
| Age | 34 |
| Tech Savviness | Intermediate |
| Primary Goal | Manage finances quickly |
2.2 Map User Journeys
A user journey map visualizes the steps a person takes to achieve a goal. It highlights emotional highs and lows throughout the process.
- Identify the starting point and the end goal.
- List every interaction the user has with the system.
- Note the emotions felt at each stage.
- Identify opportunities for improvement.
2.3 Define Success Metrics
How will you know if your design is successful? Establish key performance indicators (KPIs) early on.
- Task Completion Rate: Can users finish the task?
- Time on Task: How long does it take?
- Error Rate: How many mistakes do they make?
- Satisfaction Score: How happy are they with the experience?
Phase 3: Information Architecture and Structure 🗺️
Before designing screens, you need to organize the content. This is known as Information Architecture (IA). It ensures users can find what they need without getting lost.
3.1 Create a Sitemap
A sitemap outlines the hierarchy of pages within your product. It acts as a blueprint for the structure.
- Start with the main landing page.
- Branch out into primary sections.
- Detail sub-pages and content types.
3.2 Design User Flows
User flows show the specific path a user takes to complete a task. Unlike a sitemap, which shows structure, a flow shows logic and decision points.
- Use flowcharts to map the process.
- Include decision diamonds for conditional paths.
- Identify entry points and exit points.
Common Flow Elements:
- Start Node: Where the user enters the flow.
- Process Node: Actions the user takes.
- Decision Node: Questions or choices made.
- End Node: The successful completion of the task.
Phase 4: Wireframing 📐
Wireframes are low-fidelity sketches that outline the layout of each screen. They focus on structure and hierarchy, ignoring colors and images.
4.1 Low-Fidelity Sketching
Start with pen and paper or a whiteboard. This allows for rapid iteration without getting attached to details.
- Focus on the placement of key elements.
- Use boxes to represent images or buttons.
- Label text blocks with dummy content.
4.2 Mid-Fidelity Digital Wireframes
Once the structure is approved, move to a digital tool. This version is more precise and includes basic interactions.
- Use a grid system to maintain alignment.
- Define typography hierarchy (headings, body text).
- Establish spacing and padding rules.
- Ensure accessibility standards (contrast, font size).
4.3 Key Design Elements
Every screen needs specific components to function correctly.
- Navigation: Menus, breadcrumbs, and links.
- Content Areas: Where text and media live.
- Controls: Buttons, forms, and sliders.
- Feedback: Messages confirming actions or errors.
Phase 5: Prototyping 🎬
A prototype is an interactive model of your design. It simulates the final product to test usability before development begins.
5.1 Determine Interactivity Levels
Not all prototypes need to be fully clickable. Choose the fidelity based on your testing goals.
- Click-Through: Simple links between screens.
- Micro-interactions: Hover states, toggles, and animations.
- Dynamic Logic: Conditional changes based on input.
5.2 Build the Prototype
Connect your wireframes using a digital design tool. Ensure the flow matches the user journey maps created earlier.
- Link buttons to their destination screens.
- Add transitions to make movement feel natural.
- Test the flow on a mobile device if applicable.
- Check for broken links or missing states.
5.3 Document Interaction States
Users interact with your product in different ways. You must design for these variations.
- Hover: What happens when the mouse is over an element?
- Active: What does a button look like when pressed?
- Disabled: How does a button look when inactive?
- Empty: What does a screen look like before data is loaded?
- Error: How do you inform the user of a mistake?
Phase 6: Usability Testing ✅
Testing is where you validate your assumptions. You observe real users trying to complete tasks with your prototype.
6.1 Plan the Test
Define the scope of your testing session. Who are you testing with and what are you measuring?
- Select participants who match your personas.
- Recruit 5 to 8 users for a single round.
- Prepare a script with specific tasks.
- Choose a testing environment (remote or in-person).
6.2 Conduct the Sessions
During the test, your role is to observe, not to guide. Encourage users to think aloud.
- Ask them to describe what they are doing.
- Do not correct them if they make a mistake.
- Note where they hesitate or get confused.
- Record the session for later review.
6.3 Analyze Results
After the sessions, compile your findings. Look for patterns in the errors and feedback.
- Identify the most common usability issues.
- Prioritize fixes based on severity.
- Update the wireframes and prototype accordingly.
- Share insights with the development team.
Phase 7: Handoff and Iteration 🔄
Once the design is validated, it is time to prepare it for development. This phase ensures the final build matches the vision.
7.1 Prepare Design Specifications
Developers need precise instructions to build the interface. Create a handoff document or use a dedicated platform.
- Provide exact measurements for spacing.
- Specify color codes and font weights.
- Include assets like icons and images.
- Document behavior for complex interactions.
7.2 Collaborate with Developers
Design is a team effort. Stay involved during the build phase to ensure quality.
- Answer questions from the development team.
- Review the build as it progresses.
- Conduct visual QA (Quality Assurance) checks.
- Address any deviations from the design.
7.3 Plan for Future Updates
A product is never truly finished. Plan for iteration based on real-world usage.
- Monitor analytics after launch.
- Gather user feedback continuously.
- Schedule regular design reviews.
- Iterate based on new data.
Summary of Deliverables 📋
Every project is unique, but most UX projects share common deliverables. This table summarizes what you produce at each stage.
| Phase | Key Deliverables |
|---|---|
| Discovery | Research Report, Problem Statement |
| Definition | Personas, User Journey Maps, KPIs |
| Structure | Sitemaps, User Flow Diagrams |
| Wireframing | Low-Fi Sketches, Mid-Fi Digital Wireframes |
| Prototyping | Interactive Prototype, Interaction Specs |
| Testing | Test Report, Usability Findings |
| Handoff | Design System, Style Guide, Assets |
Timeline Estimates ⏱️
Understanding how long each phase takes helps with project planning. These estimates vary based on project complexity.
| Phase | Typical Duration |
|---|---|
| Discovery & Research | 1 – 3 Weeks |
| Definition & Strategy | 1 – 2 Weeks |
| Structure & IA | 1 Week |
| Wireframing | 1 – 2 Weeks |
| Prototyping | 1 – 2 Weeks |
| Testing & Iteration | 1 – 2 Weeks |
| Handoff | 1 Week |
Common Pitfalls to Avoid 🚧
Even experienced designers face challenges. Here are common mistakes to watch out for during the process.
- Skipping Research: Designing without data leads to assumptions.
- Focusing on Aesthetics Too Early: Don’t worry about colors before layout is solved.
- Ignoring Accessibility: Ensure your design works for everyone.
- Over-Prototyping: Do not build a perfect prototype if a sketch will suffice.
- Skipping Testing: Never assume your design works without testing it.
Final Thoughts 💡
Designing a user experience is a cycle of learning and improving. By following these steps, you create products that solve real problems for real people. The process requires patience and attention to detail, but the result is a digital experience that resonates with your audience.
Remember that tools change, but the principles of human-centered design remain constant. Focus on the user, validate your decisions, and iterate based on feedback. This approach builds trust and creates value in the long run.
Start your next project with this framework in mind. Document your work, share your findings, and keep refining your craft. The path from concept to prototype is challenging, but it is also where the most meaningful work happens.

